Hey Photonauts… Orange and teal is a fresh twist on the classic color combination. Orange and teal is perfect for you if you’re looking for something different to add to your photos for instagram posts, or if you’re thinking about making your images look different.
If you want to use the same phot to practice go to: Pexels.com
How to create Orange and Teal color grading
As mentioned I will edit this photograph with Luminar Neo to create an orange and teal color grade. This color combination or “grading” is very popular and there are many ways to achieve it.
In general terms the process is to “colorize” shadows and highlights with orange or teal(Aqua). The discussion regarding which color must be used will be endless…
There are people that say that shadows must be teal and highlights orange, others propose that is the opposite and others are inclined to use either color depending on what they want to accent based on what is more prominent in their photos.
I will agree with the last group of people because every photo is not the same and the purpose may also be different. So, I will show you how to do it with this photograph.
This photo is very simple, there is a man standing with lots of light coming from the front and a somewhat blurred background. It has an overall “greenish” color cast and if you check it in detail you´ll see that there is prominence of midtones and highlights.
So, I will focus the teal and orange effect on those two areas.
There are several ways to achieve it as I said and Luminar Neo makes it simple.
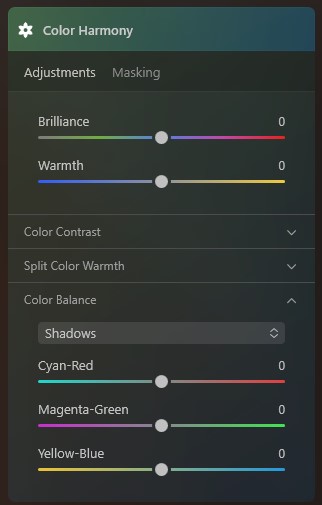
In Luminar Neo I will focus the color grading steps using the “Color Harmony” section of the program. This section lets you have a lot of control over the color landscape of the photograph, it lets you modify the hue, color contrast, split the color warmth and specifics color balance.
It is a little tricky if you are used to other editing software that use color wheels or maps for split toning. If you are new to Luminar Neo it will be easy for you, because to use Luminar Neo you don’t need to have experience or be an expert photo editor.
In the video I show in detail each of the sliders I used in each edit module, but here is the sequence. This is the order I used, but the same result could be achieved applying the adjustments in a different order. Navigate the tabs to check the settings:
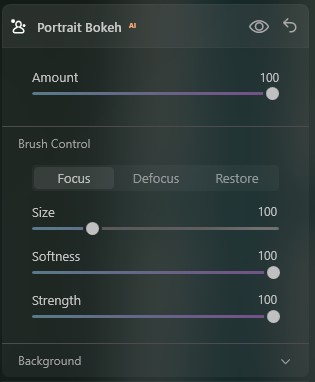
Portrait Bokeh: Amount to 100% to defocus the background. If needed fine tune the mask created in the mask option module
Color Harmony:
Brilliance 25
Warmth -26
Color Contrast: 0
Split Color Warmth:
Warm -3
Cool -38
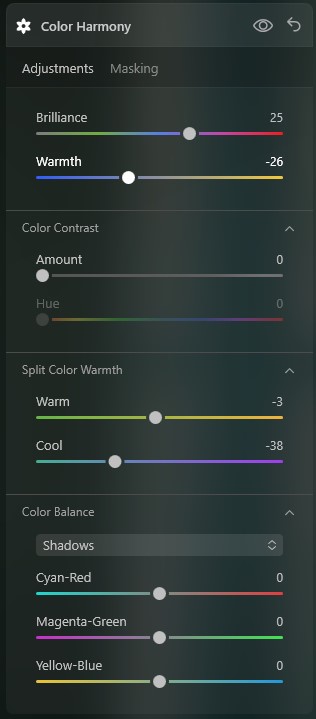
Shadows: No changes
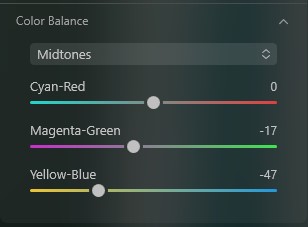
Midtones: 0 | -17 | -47 (Cyan-Red | Magenta-Green | Yellow-Blue)
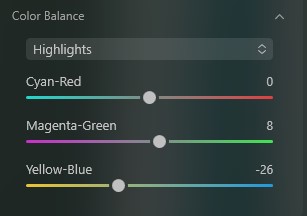
Highlights: 0 | 8 | -26 (Cyan-Red | Magenta-Green | Yellow-Blue)
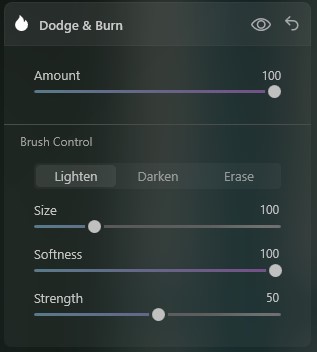
Dodge and Burn: Applied by brush to jacket, hair, and beard. (Use to your liking)
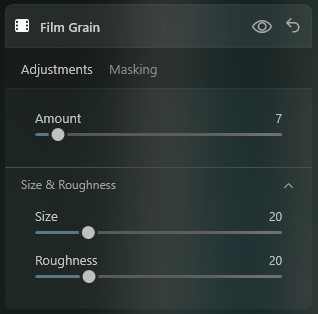
Film Grain(optional): Amount 7; Size 20; Roughness 20
Vignette: Linear gradient at top and bottom of the picture in the Develop module, reduced exposure to your liking.
Enhance AI: 30
Remember that these are not “one size fits all” sequence of adjustments, but it may help you to get started. You have to observe which of the three areas (shadows, midtones, highlights) in your photo is more prominent.
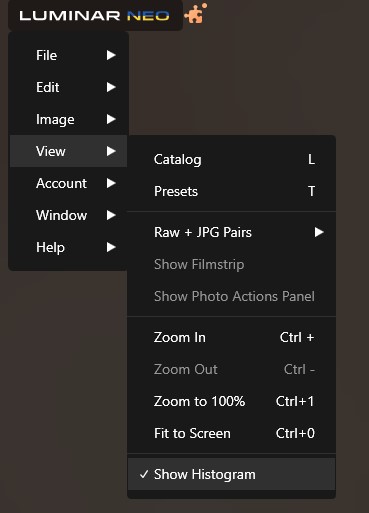
Luminar Neo doesn’t show the histogram by default, so you will need to activate it form the image menu. Shadows are close to black (to the left of the graph), midtones are kind of in the middle and highlights (toward the right side of the graph) close to pure white.
Thank you for reading and watching the video and I hope that the information I shared here is of some value to you. If you have questions or comments, please leave them in the comments box below.
Until the next Straight to the Point Tutorial!!
Blessings,
José
Check it out!
One click edits
Edit your photographs in no time with excellent resuts. Presets, AI adjustments to transform your photos from great to WOW!
Change Background
Use the powerful background removal AI system to erase the background and replace it wtih one of your liking.