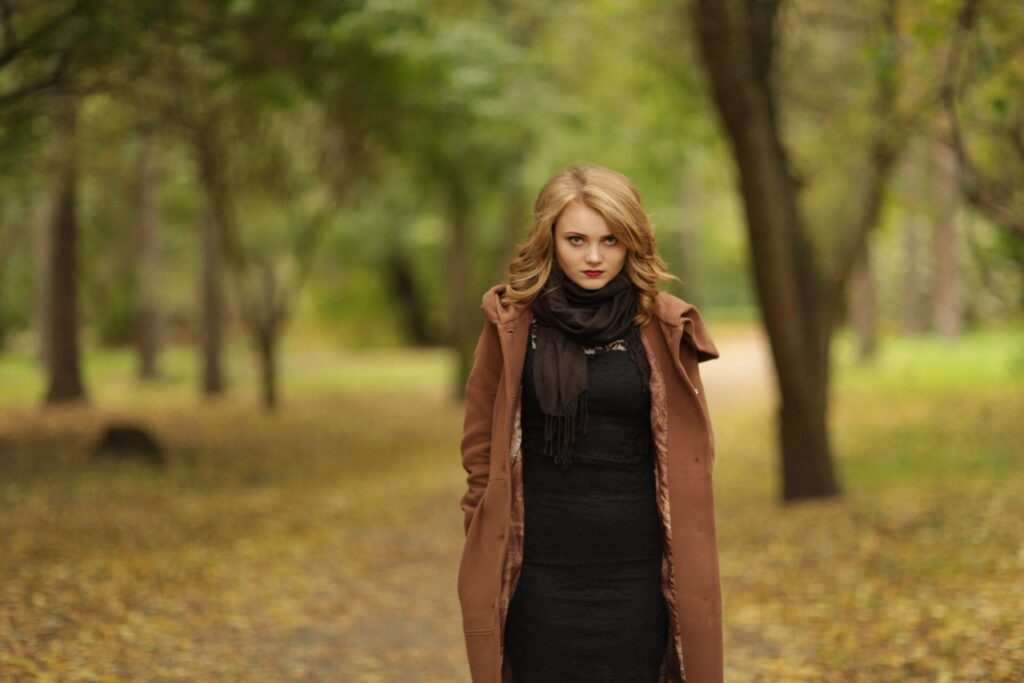
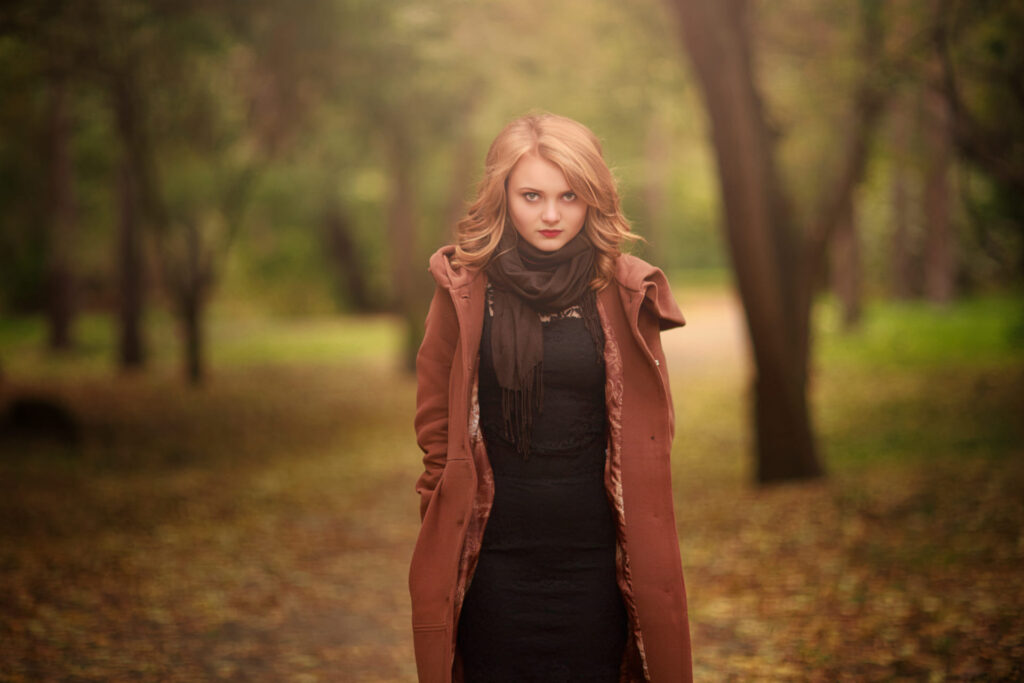
If you are an outdoor portrait photographer, you know it can be challenging to capture the perfect shot. The lighting, weather, and environment can all affect the quality of your images.
However, with the Luminar Neo software, you can enhance your outdoor portrait photography and create stunning images with ease. In this tutorial, we’ll take you through a step-by-step process that will help you get the most out of your outdoor portrait photography.
Photo: Signature Edits | Sun Flare Package: Sun Flares
Before we dive into the editing process, it is essential to note that Luminar Neo offers a wide range of tools that allow you to adjust various aspects of your photo. To keep things simple, we will focus on the essential tools needed to fulfill this task.
So, let’s get started!
Camera Profile and Crop
The first step to enhancing your outdoor portrait photography with Luminar Neo is to set the camera. This setting will help bring out the best in your subject’s skin tones and features, in this portrait I used “Portrait”. Next, I adjusted the white balance to 6216 and increase the tint by +3. This will add a warm and inviting feel to the image.
Cropping is also essential in outdoor portrait photography. It helps to center your subject and eliminate any distracting elements. To do this, select the crop tool and center your subject, ensuring that the focus is on their face.
Once you have adjusted the camera profile and crop, you are ready to move on to the next step.
Supersharp AI and Details
The Supersharp AI and Details tools are great for enhancing the texture and details in your outdoor portrait photography. First, I selected the Supersharp AI tool and set it to low. This will help sharpen the image without making too artificial. I also ticked the Face Enhancer tool to erase any blemishes or imperfections around the face and eyes. This will help to brighten up the eyes and make them look more alive.
Details are crucial in outdoor portrait photography, and Luminar Neo has a great tool for enhancing them. Selected the Details tool and set the Medium to +70 and Large to +46. This will help bring out the finer details in the image, such as the subject’s hair and clothing. But I focused on the eyes to recover sharpness
Face and Body AI
The Face and Body AI tools are designed to enhance specific features of your subject. I started by selecting the Face AI tool and using the Eye Enhancer to brighten up the eyes, setting it to +52. Next, I used the Dark Circles Removal tool to eliminate any dark circles under the eyes, setting it to +34.
I also used the Improve Eyebrows tool to enhance the appearance of the eyebrows, setting it to +32. Finally, used the Lips Saturation and Lips Redness tools to bring out the natural color of the subject’s lips, setting them to +45 and +43, respectively.
The Body AI tool is excellent for enhancing your subject’s body shape. Used the Shape tool to add curves and definition to the subject’s body, setting it to +61. And also the Abdomen tool to slim down the abdomen area, setting it to +100.
Enhance AI and Develop
The Enhance AI and Develop tools are great for adjusting the overall exposure and lighting in your outdoor portrait photography. Selected the Enhance AI tool and setting the amount to +34. This will help bring out the colors and contrast in the image.
Next, selected the Develop tool and applied a horizontal linear mask from left to right. This will help to create a horizontal vignette adjusting the exposure to -1.24 to add a slight underexposure to the sides of the subject.
Relight, Layer, and Vignette
The Relight AI, Layer, and Vignette tools are great for adding depth and interest to your outdoor portrait photography. Started by selecting the Relight AI tool and setting the brightness far to -72 and the depth to +85. This will add a dreamy and ethereal effect to the image nad make the subject stand out more.
The Layer section is great for adding elements to your image. Imported a Sun Flare PNG image and align it to the top middle of the image. This added more presence to the dreamy and warm look.
The Vignette optional but can add a nice finishing touch to your image. Use it to darken the edges of the image slightly, drawing the viewer’s attention to the subject in the center.
Final Thoughts
Enhancing your outdoor portrait photography with Luminar Neo is easy and fun. By these step-by-step instructions as a guide, you can create stunning images that capture the essence of your subject and the environment.
Remember to play around with the tools and settings to find the perfect balance for your images. With Luminar Neo, the possibilities are endless.


