Spring is the perfect time for photographers to capture beautiful moments with their cameras. The season is filled with vibrant colors, beautiful flowers, and warm sunshine.
However, even with the best camera, sometimes our photographs need a little bit of tweaking to bring out the best in them. That is where photo editing comes in.
In this post, we will take a look at a retouching workflow that makes springtime photo editing easy. We will explore various tools and techniques that will help you bring out the beauty of your springtime photos.
Photo: Signature Edits | Sun Flare Package: Sun Flares
I will be using Skylum’s Luminar AI, an innovative photo editing software that uses artificial intelligence to enhance your photos.
Let us dive in and explore the retouching workflow.
Correcting Composition
The first step in our retouching workflow is to correct the composition of our photo. Sometimes when we take photos, we do not get the composition right. This can be due to various factors such as lack of time, the subject moving, or other distractions. However, with Luminar Neo´s Crop AI, you can easily correct the composition of your photos.
Crop AI uses artificial intelligence to analyze your photo and recommend the best crop for your photo. This means that you do not need to spend time figuring out the best crop for your photo manually.
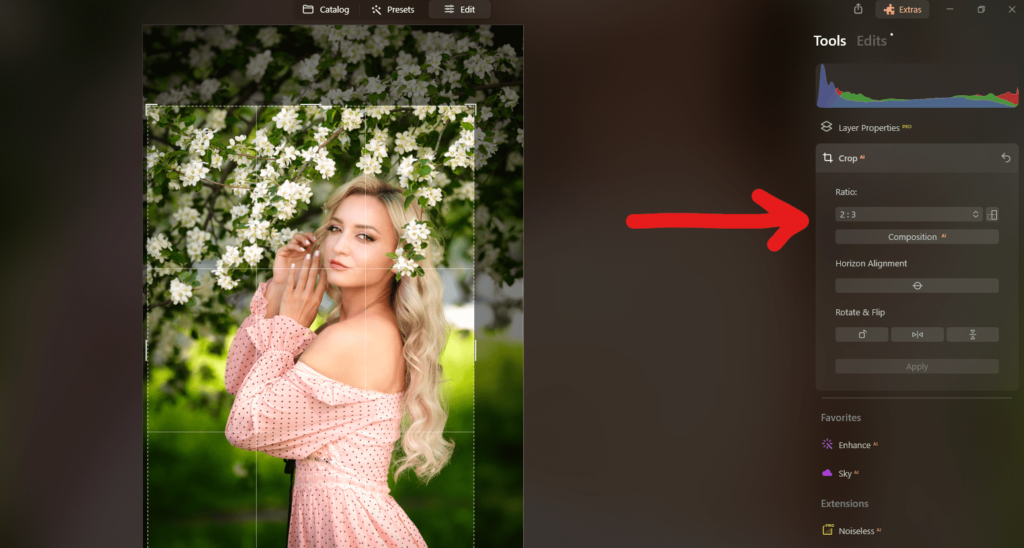
Simply select Crop AI, and the software will do the rest for you. Once you have corrected the composition of your photo, you can move on to the next step
Color Correction
The next step in our retouching workflow is to correct the color balance of our photo.
When we make photos, sometimes the colors do not come out right. This can be due to various factors such as lighting or the camera’s settings. However, with Luminar Neo’s Develop RAW, you can easily correct the color balance of your photos.
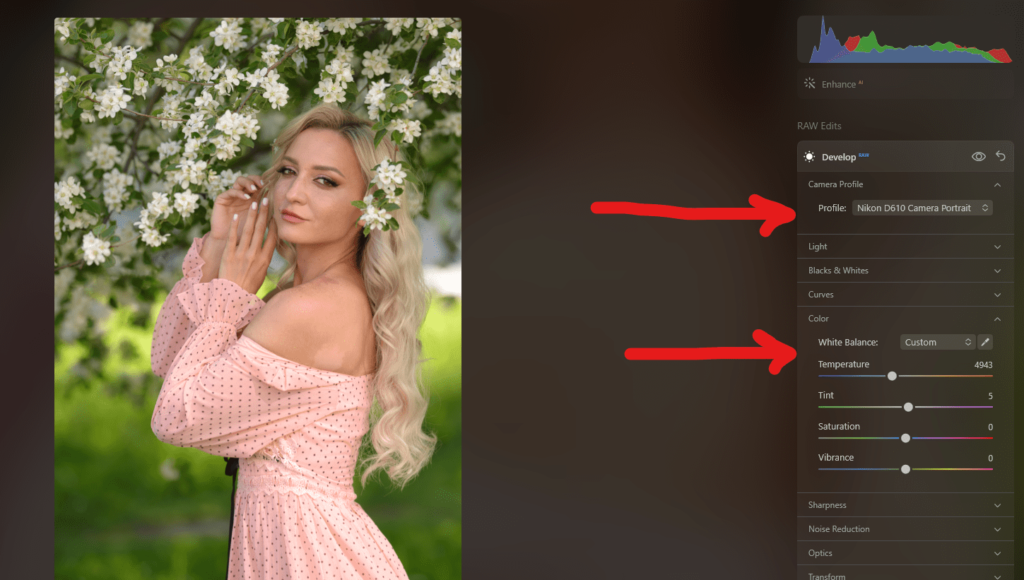
The first thing you need to do is select the camera profile. This profile is designed to enhance skin tones and colors in portraits. In this photo I set under the color section the temperature to 4943 and Tint +5. This will correct any color imbalances and adjust it to my liking.
Once you have corrected the color balance of your photo, you can move on to the next step.
Portrait Enhance with AI
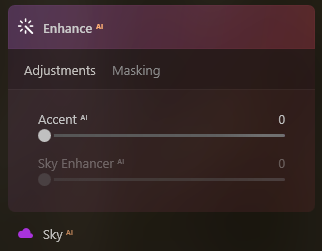
After correcting the color balance of your photo, the next step is to enhance the highlights and shadows of your photo. Luminar Neo’s Enhance AI uses artificial intelligence to analyze your photo and enhance the highlights and shadows of your photo.
In this portrait I set Accent AI to 50. This will enhance the details and colors in your photo. Once you have set Accent AI, you can move on to the next step.
Face light, skin and features retouching
Face AI
Now that we have corrected the color balance and enhanced the highlights and shadows of our photo, the next step is to enhance the models face in our portrait. Luminar Neo’s Face AI uses artificial intelligence to analyze your photo and enhance the face attributes.
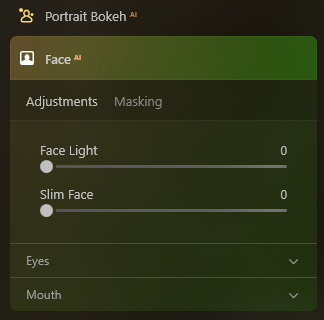
In this portrait I set Face light to 59. This will enhance the lighting on the face. Next, I set Slim Face to 23. This will slim the face of the subject. After that, set Eye Enhancer to 75. This will enhance the eyes. Then, set Dark Circles Removal to 43. This will remove any dark circles under the eyes.
Next, set Improve Eyebrows to 34. This will enhance the eyebrows in the photo. Then, set Lips Saturation to 49. This will enhance the saturation of the lips. Finally, I set Lips Redness to 67. This will enhance the redness of the lips in the mouth area.
Once you have enhanced the face in your photo, you can move on to the next step.
Develop (Re-adjust color grade)
After enhancing the face in the photo I decided to re-adjust the overall tone, look and fill of the portrait.
I set Smart Contrast to 41. This will enhance the contrast using artificial intelligence. Next, I up the Highlights to 47 to brighten up higlights affecting the entire portrait. After that, set Saturation to 10 to deepen the colors of the whole photo.
Skin AI
Now that I have readjusted the photo, the next step is to fix any blemishes on the face. Luminar Neo’s Skin AI uses artificial intelligence to analyze the photo and fix blemishes on the face.
I proceeded to set the Amount to 60. This will adjust the strength of the Skin AI tool. Next, I ticked Skin Defects Removal AI. This will remove any prominent blemishes on the face of the subject.
Smoothen Body Skin
After fixing blemishes on the face, I decided to flatten the skin texture of the back and shoulders. I use Luminar Neo’s Glow tool to flatten the skin texture of the back and shoulders quickly and easily.
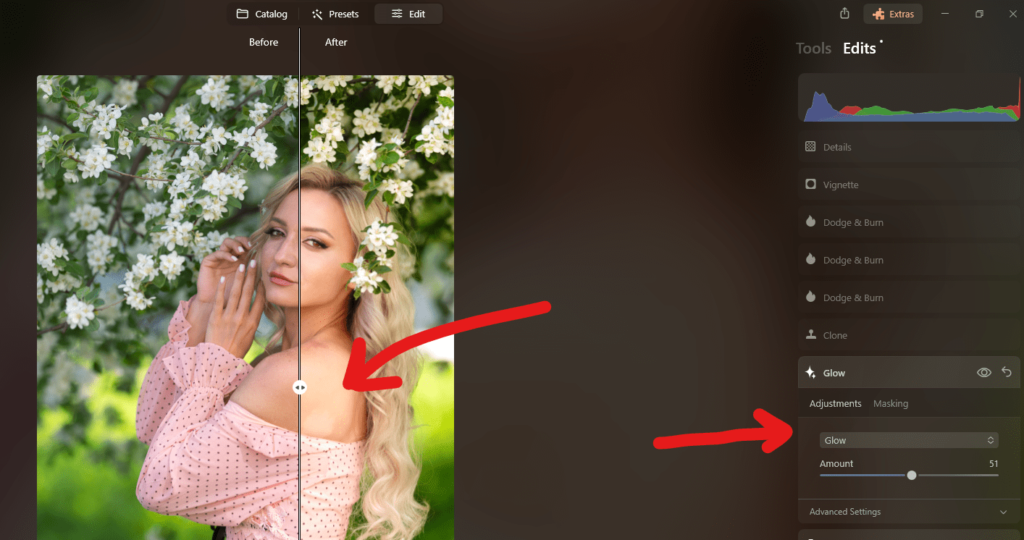
The first thing you need to do is select the Glow preset. With the help of a masking brush you will be able to paint the effect on those areas. I set the Amount to 51 and started painting the efect over her shoulder and back to smoothen the skin texture.
Make Details Stand Out | Dodge & Burn
Dodge and Burn is like magic for photos! It’s a way to make some parts of a photo brighter (that’s called “dodging”) and other parts darker (that’s called “burning”).
Imagine you have a coloring book and you want to make some parts brighter with a white pencil and some parts darker with a black pencil. Dodge and Burn is like doing that but on a photo!
You can use Dodge and Burn to make a photo look better by adding more details and making some parts stand out.
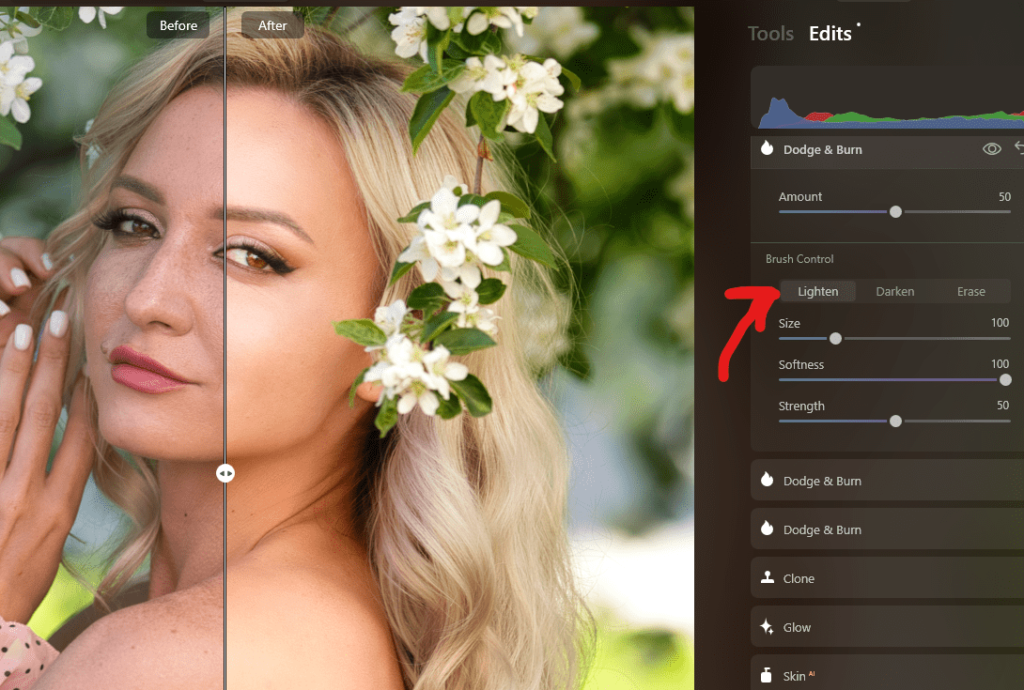
For example, if you took a picture of your friend outside and their face looks too dark, you can use Dodge to brighten it up so you can see their smile better. Or if you took a picture of a sunset and the colors are a little dull, you can use Burn to darken the sky and make the colors pop!
Professional photographers and digital artists use Dodge and Burn to make their photos look amazing. They use special tools in photo editing software to carefully brighten and darken parts of the photo to create the perfect look. It’s like being an artist and using light and shadow to create a masterpiece!
Final Comments
Springtime photo editing does not have to be complicated. With Skylum’s Luminar Neo, you can enhance your photos quickly and easily. The retouching workflow we have explored in this post is designed to make springtime photo editing easy.
However, do not be afraid to experiment with the various tools and techniques available in Skylum’s Luminar Neo. The more you use the software, the more you will discover its capabilities.
So, grab your camera, head outside, and capture the beauty of spring. Then, use Skylum’s Luminar Neo to enhance your photos and share them with others. Happy editing!

Check it out!
One click edits
Edit your photographs in no time with excellent resuts. Presets, AI adjustments to transform your photos from great to WOW!
Change Background
Use the powerful background removal AI system to erase the background and replace it wtih one of your liking.