In this tutorial I’m going to show you how to remove a background in luminar neo.
What if you could remove the background from your photos in just one click? Luminar has been called a killer program and it’s easy to see why. With Luminar, you can remove backgrounds with a single click and make any photo black and white or stunnig.
Plus, Luminar has a ton of other features for editing your photos like filters, masks, and so because of the powerful and smart AI (Artificial Intelligence) system.
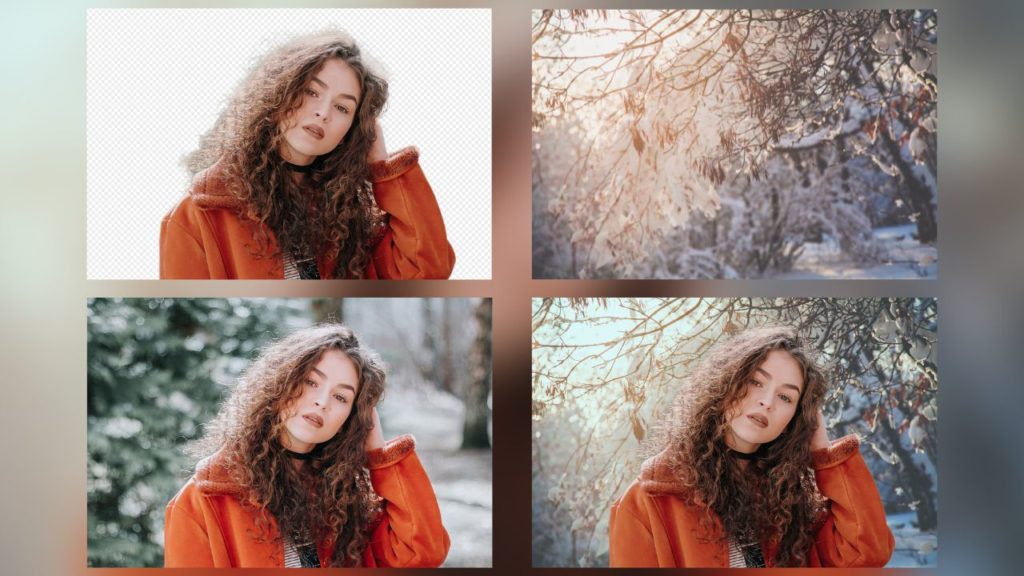
The photo I am working today has a winter background. I think it was shot like that or maybe the background was changed… Who knows?
I replaced the background with a similar look but wanted it to have a backlight to match the highlights of the hair. I took this photo from a stock site, if you want to download it and practice you can check it here: Pexels
How to remove background in Luminar Neo is super easy:
Once the background is removed you might need to fine tune the mask to fit your needs or to improve the transition, especially when the subject has many loose or flying strands of hair.
These mask adjustments are done using the “Refinements brush” section of the Portrait background tool. In there you can adjust the following:
Transition: As the name implies, this adjustment is to refine the transition between the subject and the background mask. I typically use a larger brush and drag around the edge of the part I want to refine.
Object: Use this adjustment to let the AI know to include a part or parts of the subject that it thought was parto of the background.
Background: Use this adjustem to brush in parts of the background the AI didn’t catch.
As any AI based software the more you use and practice it, you will get more proficient and the AI system as well.
Now is the time to import the new background or save the png with a transparent background. That will depend on what you want to do with the photograph once the background is removed.
Let me know how it worked for you and leave a comment below if you have any questions.
Thanks again and God bless you!
José
Check it out!
One click edits
Edit your photographs in no time with excellent resuts. Presets, AI adjustments to transform your photos from great to WOW!
Change Background
Use the powerful background removal AI system to erase the background and replace it wtih one of your liking.