In this video, I’m going to show you how to edit a portrait to create a dreamy look in Luminar Neo. We’ll be using many of the AI creative tools available in the program, such as converting the image to black and white, adding a vignette, and softening skin tones.
Download practice photo: https://www.signatureedits.com/free-raw-photos/
Download overlay(PNG file): Dreamy Sun Pack
What is a dreamy look in a portrait?
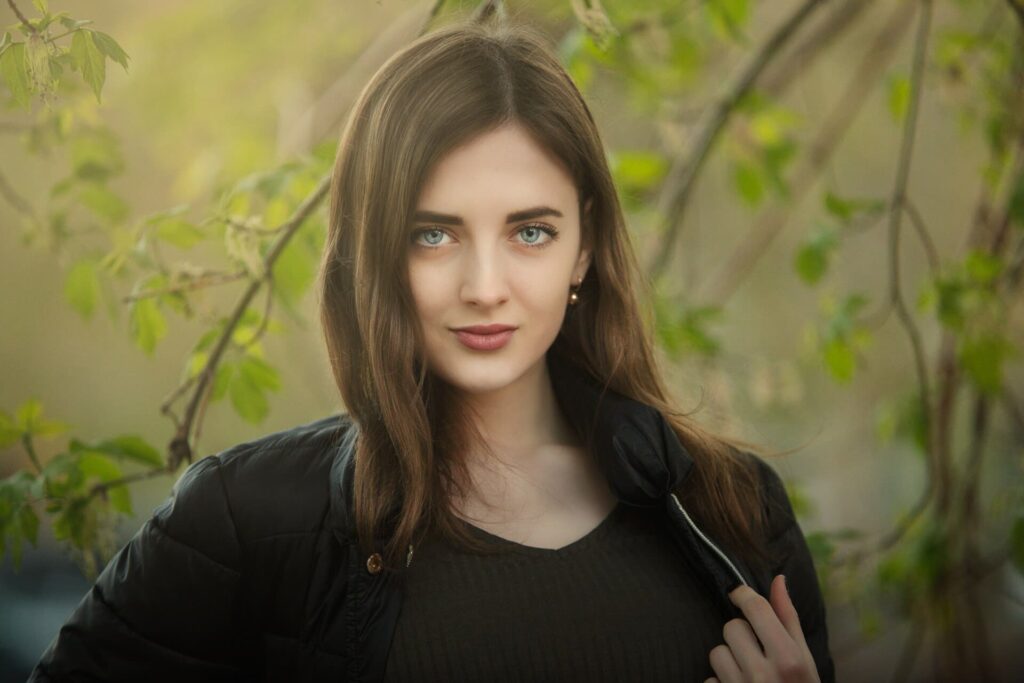
The idea behind crating a dreamy look portrait is to have a subject placed in a position that the light, usually the sun, is behind the subject that is also affected by the bokeh(blur) of the background.
It is somewhat difficult, but not impossible, to get this effect straight out of the camera, but there are certain things that need to be in place for it to happen. The purpose of this tutorial is to show you how to create the effect using a photo editing software like Luminar neo.
The sun flare behind the subject should slightly create an overall color cast with a special accent in the areas in where the subject is lit or highlighted by the sun. These areas are most of the time the back of the head, hair, and shoulders.
Below I share the workflow I used and, in the video, above you can see the process in detail.
Editing workflow in Luminar Neo
One thing I like about Luminar Neo, is that it makes it easy to accomplish certain tasks that usually will take several steps in other photo editing software. The workflow I used to edit this portrait is the following:
My Luminar Neo favorite tools
The main reason I am using Luminar Neo more an more in my edits is because of the AI based tools.
Even though some of the adjustments might look exaggerated, I did it like that because I knew that the overlay layer will darken and soften the light due to the “soft light” layer blending mode.
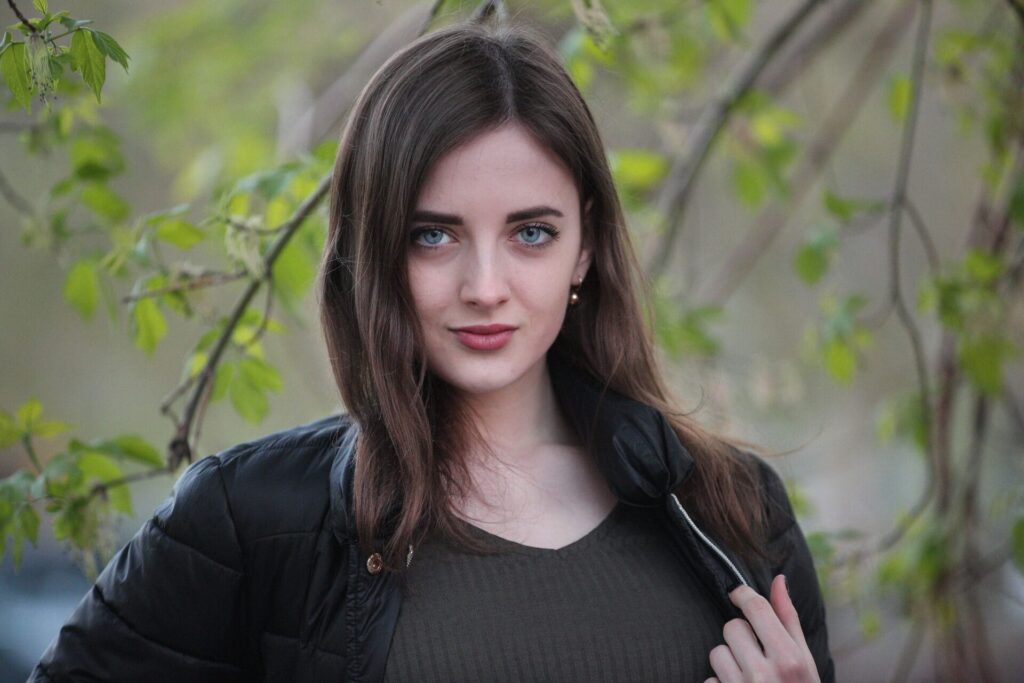
Below you could see the before and after:
If you want to check the current price, click here: ¡Luminar Neo BEST OFFER!
Until the next straight to the point tutorial!
Blessings,
José
Check it out!
One click edits
Edit your photographs in no time with excellent resuts. Presets, AI adjustments to transform your photos from great to WOW!
Change Background
Use the powerful background removal AI system to erase the background and replace it wtih one of your liking.


Thank you
YW!