Product photography for e-commerce must be done carefully so as not to create any confusion in your customer’s mind. Here are some tricks to make you the best product photographer at home.
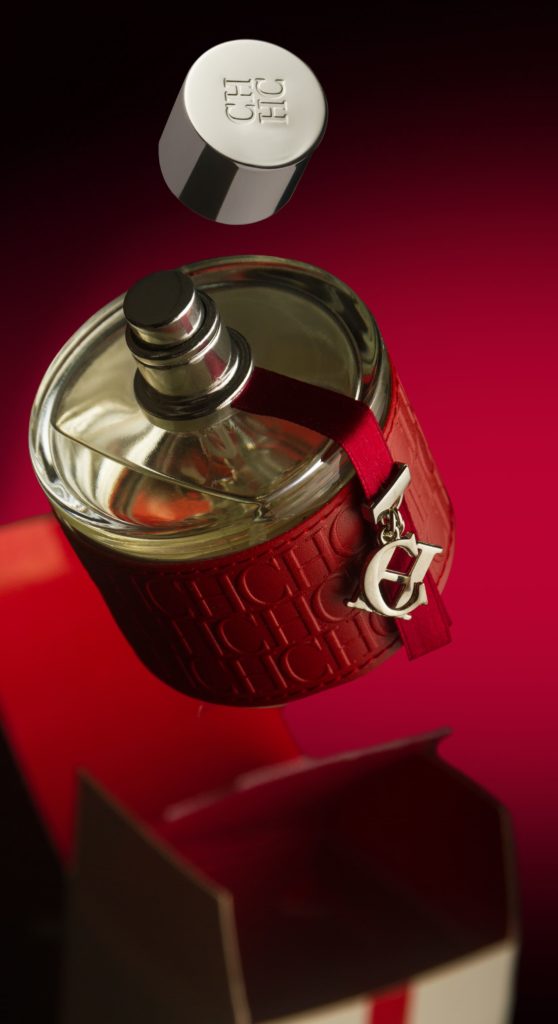
In this post I will share how I did this product shot. The idea was to make the impression that the perfume bottle popped out from the box by itself and released the cap on the way out.
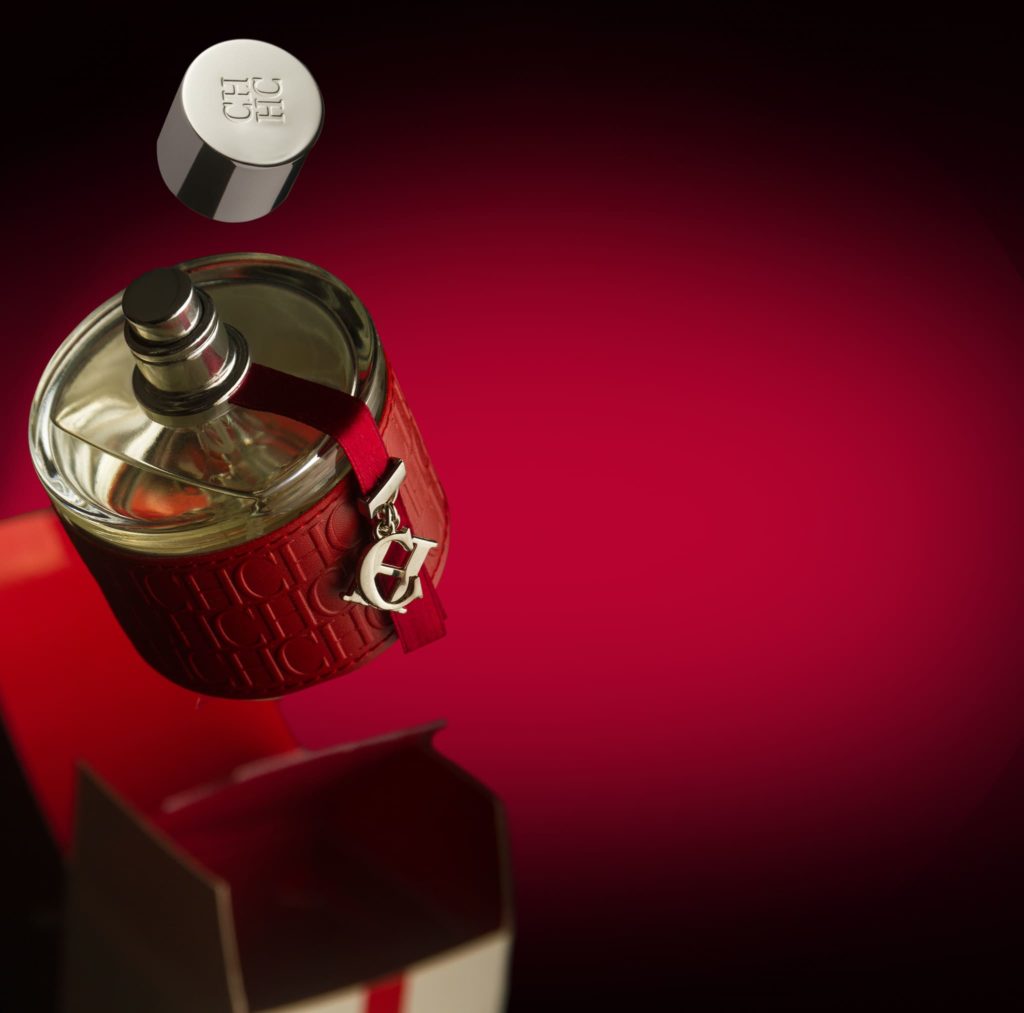
I wanted to avoid as much Photoshop processing as I could avoid. So, I decided to craft the scene with the help of simple props instead of shooting three still elements separated and then compose/manipulate them in PS.
Props used
To place the box, I used an adjustable computer table with dark a brown surface. To hold the bottle suspended in the air I used a clothing hanger taped with transparent tape to the bottom of the bottle.
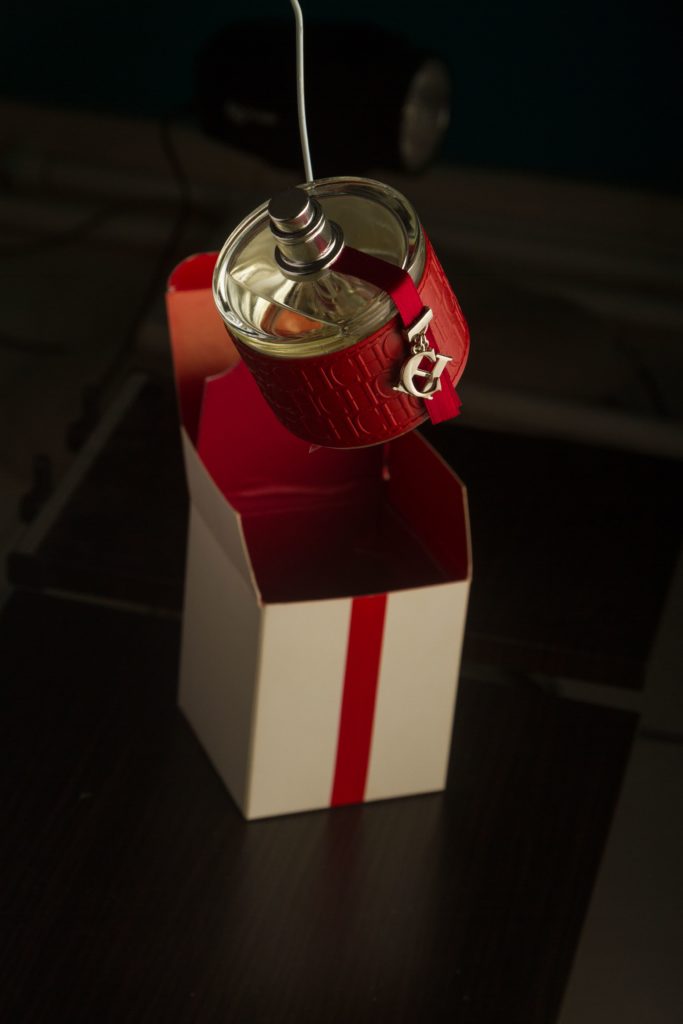
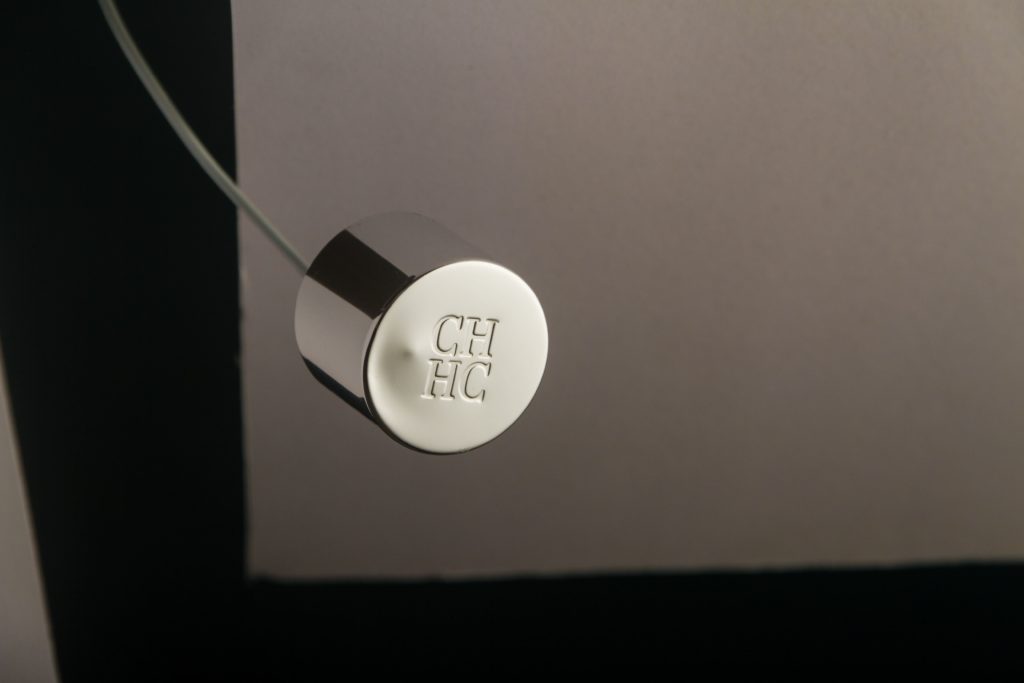
To suspend the bottle cap, I used another hanger inserted inside, pro tip: never twist the hanger with the cap on it because it will leave marks as you can see in the picture.
These hangers were fixed to a sturdy tripod using clamps and shaped them with the help of long nose pliers.
Camera and lighting gear
This photo was shot with a Canon 7D and SigmaArt 24-105 f4 lens.
I used two Godox SK400 flashes. For the main light at camera right I put a Godox 60 x 90 softbox with a homemade scrim in front to diffuse more the light from the softbox. The other flash used a reflector with a red gel to light the background.
To camera left I put a foamboard about half size of the softbox wrapped in foil paper to act as a light bouncer to highlight the top part of the bottle and soften the shadows.
Product shoot process
I spent most of the time adjusting the hangers to hold the bottle and cap in the position I wanted from the camera point of view.
I put the camera on a tripod and raised it up until the lens barrel was slightly above the cap and then angled it down a bit. I wanted the light to hit top of the cap to accent the logo on it, the glass of the bottle and the hanging lace with CH.
Camera settings are variable, but for this type of photos I usually use the lowest ISO, apertures above f/11, shutter speed to match flashes sync speed, usually 1/200 and play with different flash power values until I get the light I want.
Even though everything was in the position and looked fine, I decided to also have some shots of the bottle and cap alone in suspension in case I needed them to fix or enhance an area of the photograph
Post processing product shots
When you´ve got the right light, you will have very little post processing to do as the most important thing is to invest time in positioning the light to create the effect that you want.
In this shoot and all product shots I do, I use the simple principle: The bigger the light source in relation to your subject the more pleasant and even the light will be. That´s why I use large diffusion panels and softbox for small objects.
So, the only post processing I need to do was to clean up dust particles and some fingerprints because I didn’t used gloves with the spot healing brush, corrected white balance and “dodge and burn” highlights/shadows.
Wrapping up
Every product shoot needs planning! With out a plan or and idea you will not be able to think about the props and lights that you will need. Typically, agencies will storyboard or sketch it for you, but must of the time they will only tell you what they want and you´ll need to be creative.
Product photography is not my “forte” but I think that people out there like them as this photo was the entry card to bigger projects. So never say you can´t do it ´cause you don’t have the equipment and keep practicing with what you have.
If product photography is your thing, I will encourage you to check Karl Taylor´s work. He even has an online training website with lots of professional grade classes.
Let me know in the comments below what is your style or if you have more questions or comments about this photo.
Until the next Straight to the Point Tutorial…
Blessings, Jose